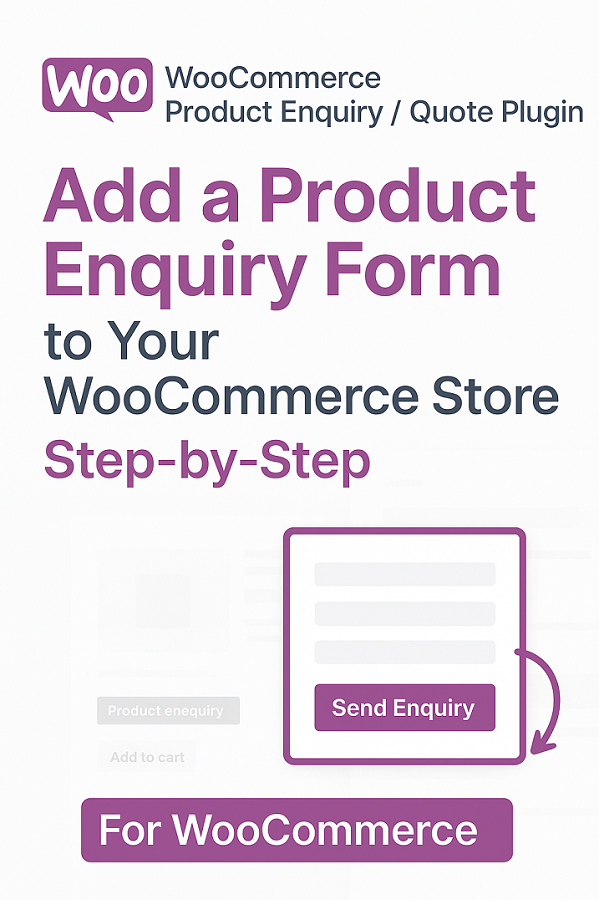
Running a WooCommerce store often means customers have questions before making a purchase. Whether they need clarification on product specifications, want to request a custom quote, or simply have pre-sale questions, providing an easy way for customers to reach you can significantly boost conversions and customer satisfaction.
In this comprehensive guide, we’ll show you exactly how to add a product enquiry form to your WooCommerce store using the WooCommerce Product Enquiry Plugin. This powerful solution lets customers submit enquiries directly from product pages, helping you capture more leads and close more sales.
Prerequisites
Before diving in, ensure you have:
- A WordPress website with WooCommerce installed and activated.
- Administrator access to your WordPress dashboard.
- The WooCommerce Product Enquiry (available on CodeCanyon).
- Active WooCommerce products in your store.
Step 1: Install and Activate the Plugin
- Log in to your WordPress admin dashboard.
- Navigate to Plugins > Add New > Upload Plugin.
- Click Choose File and select the ZIP file you downloaded from CodeCanyon.
- Click Install Now, then Activate Plugin once uploaded.
The plugin will add a new menu item called Product Enquiry to your sidebar. If you encounter any issues, feel free to reach out to the support at support@progos.org
Step 2: Basic Setup in General Settings
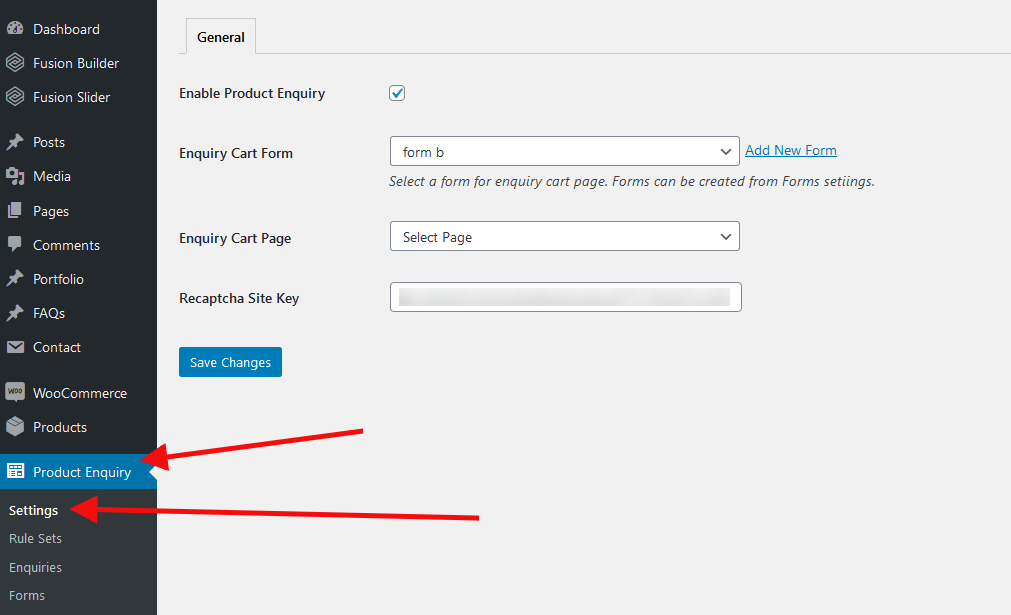
Head to Product Enquiry > Settings to get started.
- Enable Product Enquiry: Check the box at the top to activate the feature.
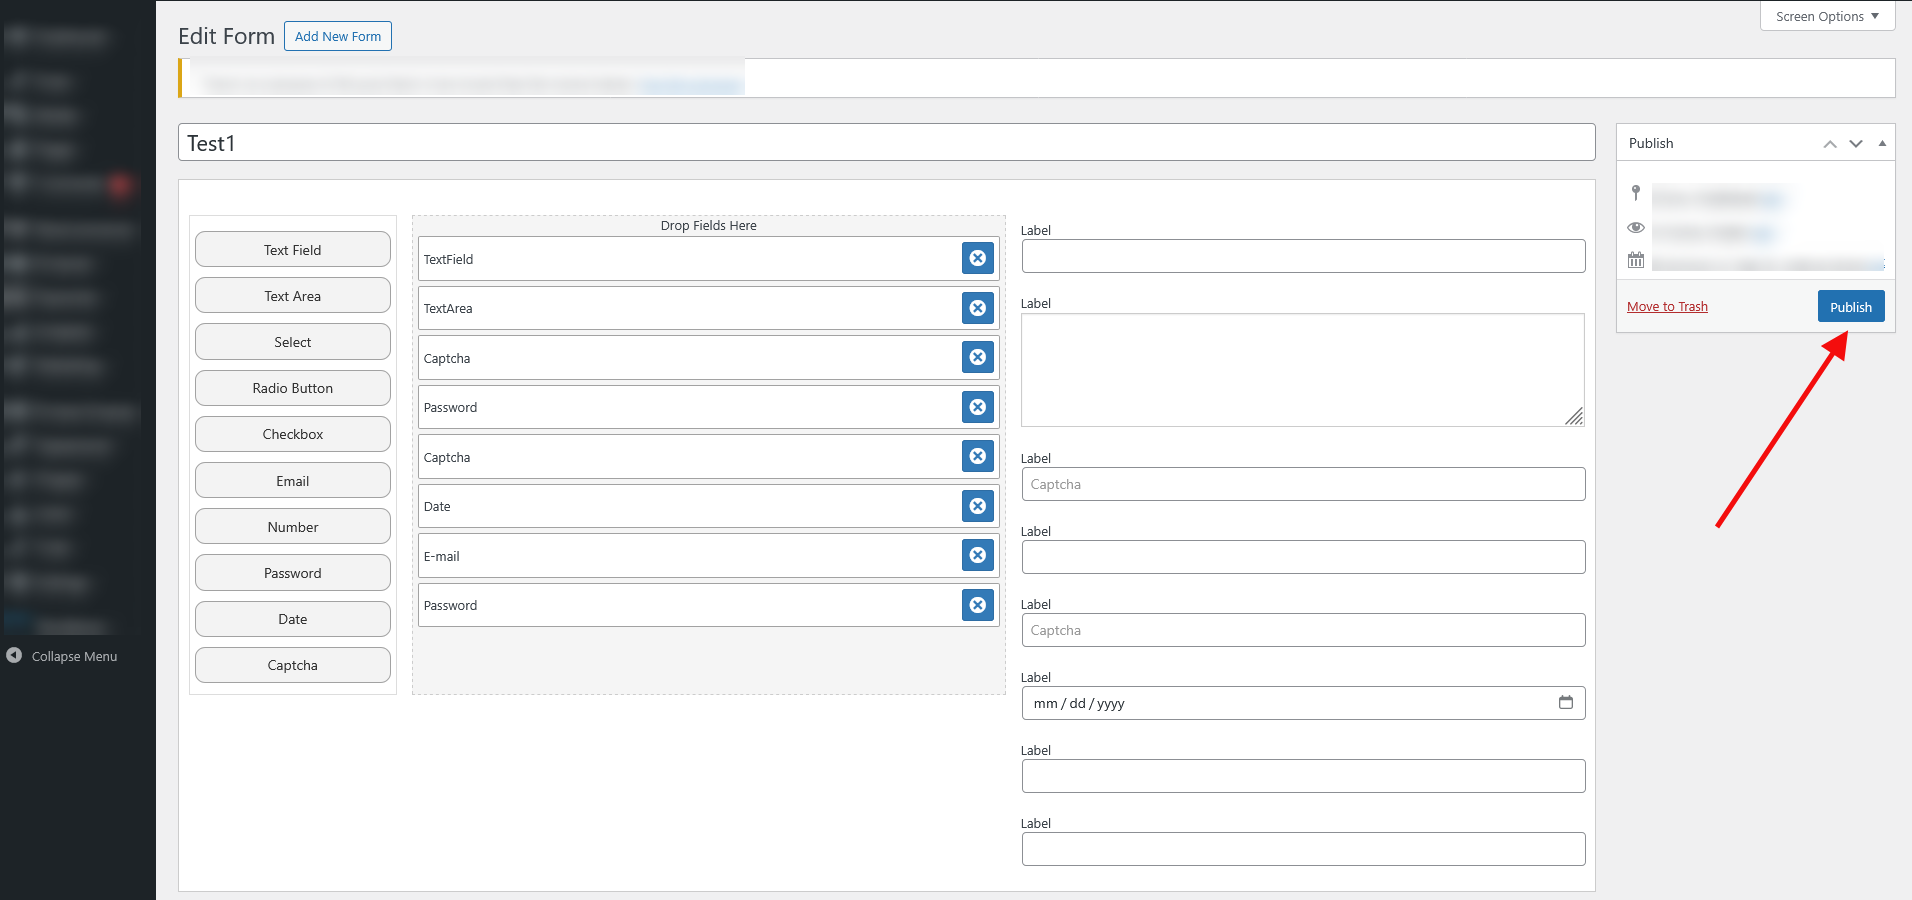
- Create Your First Form: Go to Product Enquiry > Forms > Add New. Use the drag-and-drop builder to add fields like Name, Email, Message, and more (supports text, dropdowns, checkboxes, etc.). Save and publish the form.
- Set Enquiry Cart Page: A default enquiry cart page is creating during the plugin activation named as “Enquiry Cart”. However, you can create a new page in Pages > Add New (e.g., title it “Enquiry Cart”). Insert the enquiry cart shortcode [wcpe-enquiry-cart] to display the enquiry cart. Publish the page, then select it in the plugin settings.
- Google reCAPTCHA (Optional): If you want spam protection, enter your site key from Google reCAPTCHA settings.
- Save changes.
Step 3: Create Rulesets for Products and Categories
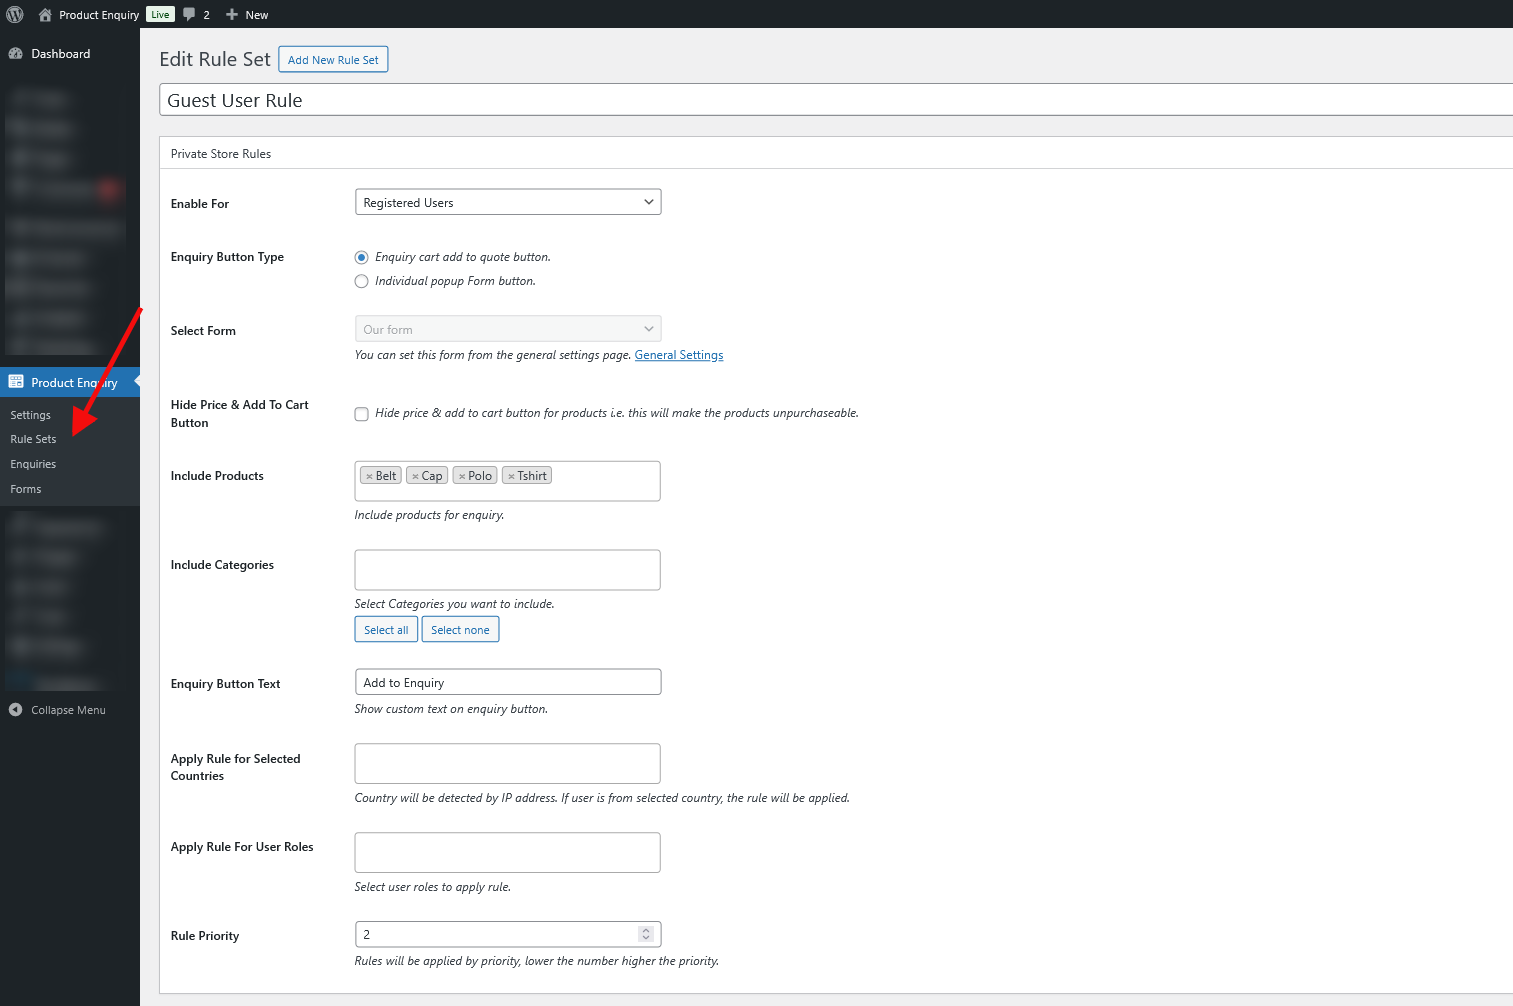
Rulesets control where and how enquiry buttons appear. Navigate to Product Enquiry > Rule Sets > Add New.
- Rule Title: Give it a descriptive name, e.g., “Guest User Enquiry”.
- User Type: Choose “Guest”, “Registered”, or both for visibility.
- Rule Type: Select “Popup Enquiry” for instant forms or “Enquiry Cart” for multi-product submissions.
- Hide Price and Add to Cart: Toggle these to replace the product price with “Enquire Now” or custom text. Add custom text like “Contact for Price”. Use the {price} shortcode to display the product price.
- Button Text: Customize to “Get Quote” or similar.
- Assign Form: Select the form you created in Step 2.
- Included Products/Categories: Search and add specific products or categories. Use the “Select All” button for bulk actions.
- Country Restrictions: Limit to specific countries if needed.
- Priority: Set a number (lower = higher priority) for multiple rules.
- Publish the rule.
Repeat for different user types or product groups. For example, use popup for Categoy1 products and cart for Category2 products.
Step 4: Customize and Test Forms
Back in Product Enquiry > Forms, edit your form:
- Drag fields from the left panel (e.g., Email as required, Message as textarea).
- Configure field settings like labels, placeholders, and required status.
- Click on the Publish button.
Test on the frontend: Visit a product page in a assigned category. You should see the enquiry button. Click it to trigger the popup or add to cart—submit a test enquiry to verify.
For enquiry cart:
- Users can add multiple items.
- They review on your designated cart page and submit via the assigned form.
See working demo here: https://product-enquiry.progostech.com/shop/
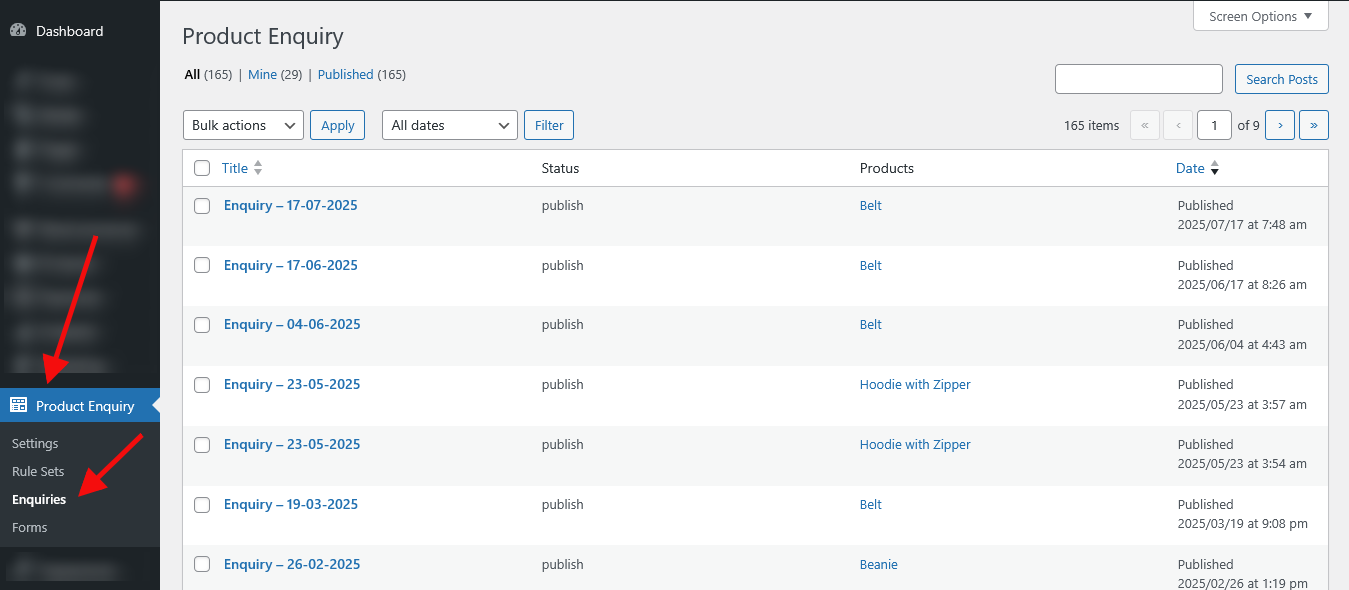
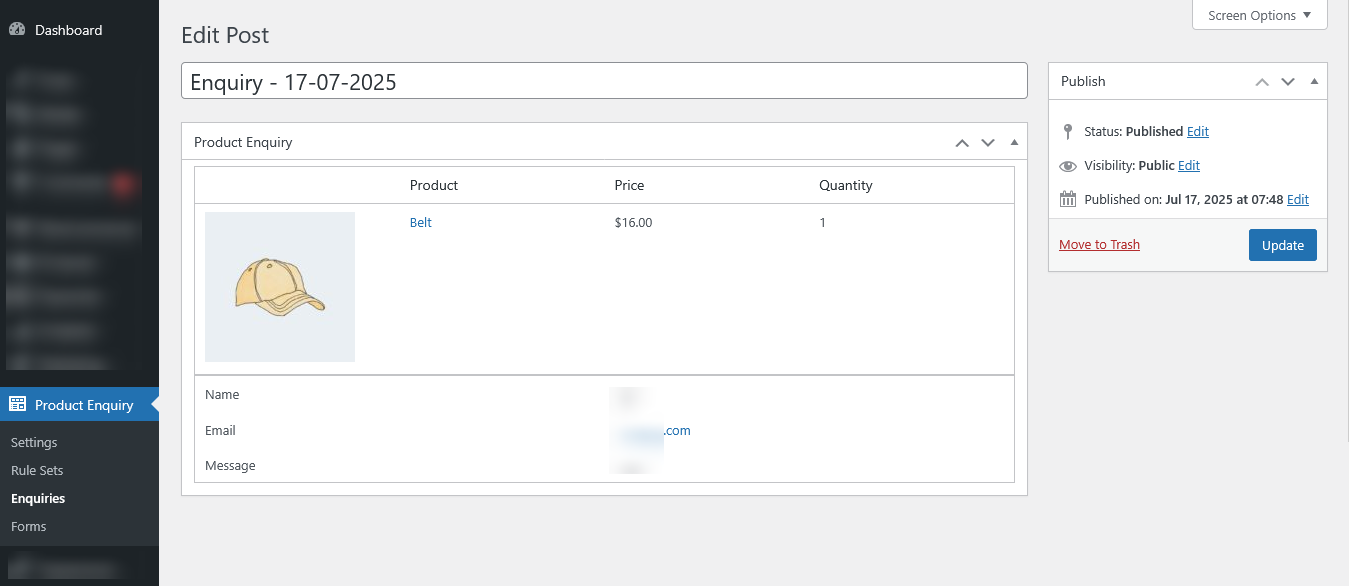
Step 5: Manage Enquiries in the Admin
All submissions land in Product Enquiry > Enquiries:
- View the list with details like products, and enquiry date/time.
- Click an enquiry to see full details and reply directly (opens your email client).
- Admin gets the email notifications for new enquiries—customize the receiver email in settings.
This dashboard makes follow-ups easy, helping convert enquiries to sales.
Advanced Tips
- Customization: Use CSS to style buttons/forms via your theme’s customizer.
- Integrations: Works with Elementor Pro and product filters.
- Security: Always enable reCAPTCHA for live sites.
- Troubleshooting: If buttons don’t appear, check rule assignments and cache.
Ready to implement? Grab the plugin from CodeCanyon today and start capturing those valuable customer enquiries.
Trusted by people | Clean code | Frequent updates | Quick support
Conclusion
With the WooCommerce Product Enquiry Plugin, adding enquiry forms is straightforward and highly customizable. You’ll boost engagement, hide prices strategically, and manage leads efficiently—all without coding.
Read more articles about this plugin here: Product Enquiry
Progos Tech is a reliable WordPress Plugins development company which offers valuable add-ons, custom eCommerce development services, and you can hire its Certified Developers.
As an expert WordPress eCommerce agency, we designed our firm with the idea of delivering the finest services in almost every field of eCommerce development. We have confidence in our WordPress and WooCommerce development services and have served to hundreds of satisfied customers.
Progos Tech specializes in leveraging the WordPress e-commerce solution for driving more revenue and offering an advanced and enhanced customer experience.
Request a Custom Quote
Schedule a call with us to discuss your requirement. Our team will understand your needs to the best of their ability to boost your business sales.